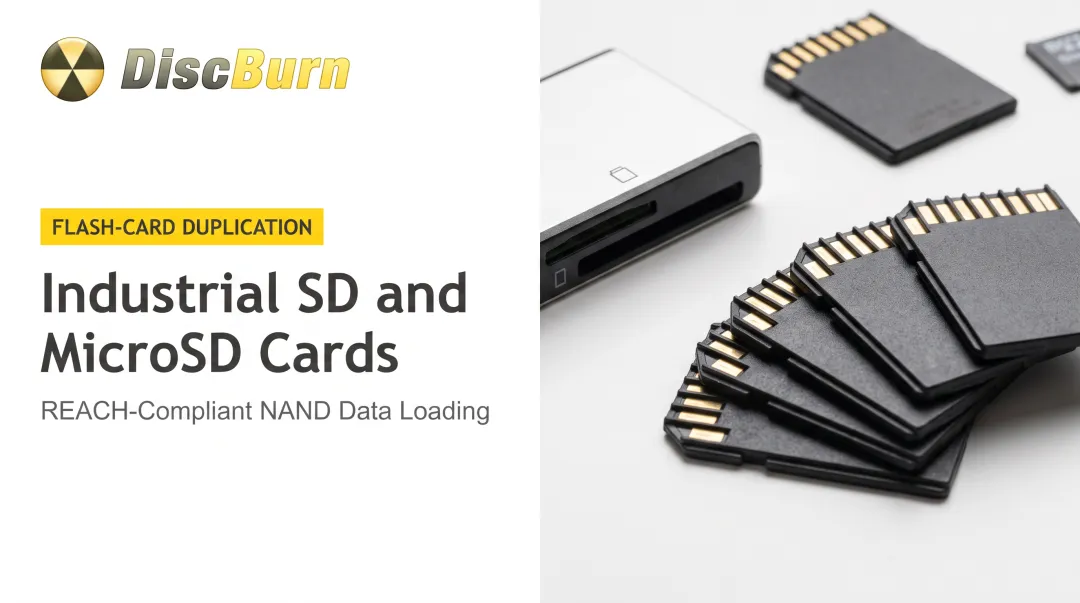
People clone cards for Raspberry Pi projects, dash cams, security systems, backups before a risky software update, and bulk device deployment for classrooms or fleets. Here's the catch: results vary a lot depending on the tool, the card's compatibility, and the settings you choose. Cloning isn't drag-and-drop.
This guide walks through the exact steps, what you need beforehand, the factors that make or break a clone, common mistakes, and when it's smarter to hand the job to a professional duplication service instead.
Key Takeaways
- Cloning copies the full disk structure (partitions, boot sectors, files), not just visible files like copy-paste
- You'll need a card reader, the source card, and a target card of equal or greater capacity
- Free tools like Win32 Disk Imager, balenaEtcher, and
ddhandle individual backups well - For dozens or hundreds of cards, use a hardware duplicator or a professional service
- Success hinges on matching capacity, picking the right cloning mode, and checking source card health first
How to Clone SD and Micro SD Cards (Step-by-Step)
Cloning builds a complete replica of the source card: operating system, file structure, and boot information included. That's why it works for backups, hardware upgrades, and rolling out identical setups across multiple devices at once.
Step 1: Prepare Your Source and Target Cards
Insert the original card and your target card into a card reader connected to your computer. Most readers accept both full-size SD and micro SD (with an adapter), so double-check yours supports the format you're working with.
Before you go further:
- Confirm the target card's capacity meets or exceeds the source card's used data, not just its labeled size
- Back up anything currently on the target card. Cloning overwrites everything, no exceptions
Step 2: Choose and Install a Cloning Tool
For casual, one-off backups, a beginner-friendly tool gets the job done without much fuss:
- Win32 Disk Imager (Windows): reads a card into a raw image file and writes that image back to removable media
- balenaEtcher (Windows, macOS, Linux): flashes images to cards and verifies the write. It doesn't create the source image, so pair it with an imaging tool first
- ApplePi-Baker (Mac): backs up a card to an IMG file and can shrink or expand Linux partitions during the process
Advanced users often reach for dd on Linux or Mac instead. It gives full control over the copy, but you need to correctly identify disk paths (/dev/disk2, for example) before running it. Get that wrong, and you could overwrite the wrong drive entirely.
Step 3: Configure Source, Destination, and Start the Clone
This is the step where mistakes get expensive. Carefully select the source card as your input and the target card as your output. Picking the wrong drive here can permanently erase data with no warning.
Next, choose your cloning mode:
- Sector-by-sector: copies every bit of the disk, used or not. Best for exact full-disk copies.
- Intelligent/used-space-only: copies only the allocated data. Better when moving to a smaller target card.
Once everything's confirmed, start the clone and let it run. Depending on card size and interface speed, this can take anywhere from a few minutes to over an hour.
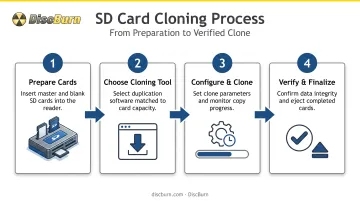
Step 4: Verify and Finalize
Eject both cards using your operating system's proper eject function before physically removing them. Pulling a card mid-write, or without ejecting first, is a fast way to corrupt files.
Then insert the cloned card into its intended device (a Raspberry Pi, dash cam, or phone) and confirm it boots or reads correctly. Comparing file counts between source and target is a quick sanity check if something feels off.
When Should You Clone an SD Card & What You'll Need
Not every backup needs a full clone. Everyday file copying works fine for grabbing photos or documents off a card. Full cloning becomes necessary when you're replicating an entire operating system, a boot setup, or deploying identical cards across multiple devices.
Common use cases:
- Upgrading a Raspberry Pi to a larger capacity card without reinstalling everything
- Backing up a working Pi setup before a risky software update
- Duplicating identical cards for classroom kits, dash cam fleets, or security camera systems
What you'll need:
- A destination card equal to or larger than the source (clones won’t fit on a smaller card)
- A card reader that supports SD and micro SD (use an adapter for micro SD); two readers help for direct card-to-card copies
- A stable USB connection; loose cables are a leading cause of failed clones
- Enough free disk space if your tool writes an intermediate image file first
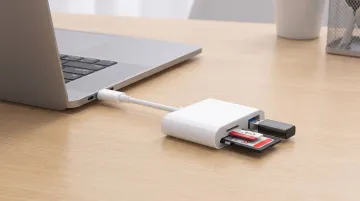
Before starting, get comfortable identifying the correct drive letter or disk identifier on your system. If you're not sure which drive is which, slow down—or leave volume runs to a professional flash-card duplication service.
Key Factors That Affect SD Card Cloning Results
Following the steps correctly isn't enough on its own. Capacity match, cloning mode, and source card health all shape whether your clone actually works once it's done.
Card Capacity Match (Source vs. Target)
Sector-by-sector cloning requires the target card to be equal to or larger than the source. Mismatched sizes lead to failed clones, wasted space, or incomplete data transfer that leaves the card unusable.
Cloning Mode Selection
| Mode | What it copies | Effect on time | Bootability |
|---|---|---|---|
| Sector-by-sector | Every sector, including free space | Slower — scales with full card size | Preserves original layout when successful |
| Intelligent/used-space-only | Only allocated data | Faster — skips empty areas | Bootable only if boot loader and partition data are recreated |
Card Health and Bad Sectors on the Source Card
A worn or failing source card can pass corrupted data straight onto the clone. Speed Class ratings from the SD Association (C2 through C10, U1/U3, V6 through V90) only guarantee minimum sequential write performance (SD Association). They say nothing about a card's remaining lifespan.
Run a diagnostic scan on the source card before cloning. Catching bad sectors early saves you from duplicating a problem instead of solving one.
Common Mistakes and Troubleshooting Tips When Cloning SD Cards
A few mistakes show up again and again, and most are avoidable with a little extra caution:
- Selecting the wrong disk in
dd— this can permanently erase the wrong drive instead of the card you meant to clone - Using a target card smaller than the source's used data — results in an incomplete or outright failed clone
- Skipping a card health check — read errors or corrupted files carry straight over onto the new card
If a clone still fails after you’ve avoided those pitfalls, work through the checks below.
Troubleshooting Common Cloning Issues
The cloned card won't boot or isn't recognized. This usually comes down to an incompatible cloning mode or a partition mismatch. Re-clone sector-by-sector onto a target card that matches (or exceeds) the source capacity so the original partition layout is preserved.
The cloning process stalls or fails midway. Faulty card readers, loose USB connections, and bad sectors on the source card cause most mid-clone failures. Try a different reader or port, and test the source card’s integrity before running the clone again.
Alternatives to DIY Cloning: When to Use a Professional SD Card Duplication Service
Manual cloning handles one-off personal backups well. It doesn't scale efficiently once you need dozens, hundreds, or thousands of identical cards.
Hardware SD Card Duplicators
Standalone duplicators — like U-Reach's multi-target systems or Nexcopy's PC-free models — copy several cards at once without tying up a computer. These work well for moderate batches, roughly 5 to 20 cards, but they require upfront equipment cost and still involve manual handling per batch.
Professional Bulk SD Card Duplication Services
For larger, verified quantities, a professional service beats doing it yourself. DiscBurn, based in Minneapolis, MN, offers SD, miniSD, Micro SD, and Compact Flash duplication with binary-level copying for both file-level and bootable cards.
Typical service details include:
- Pricing starts at $15 per unit, including the card itself
- Data loading and custom full-color labeling included (4GB and up)
- Offline MD5 verification in an air-gapped environment before shipment
- Standard 3-business-day turnaround, with a 24-hour rush option on select products
- Capacities from 1GB through 16GB, with custom sizes and volume pricing available on request
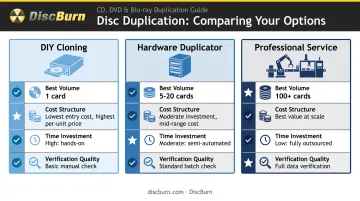
Schools and hospitals use this kind of service regularly—consistent, verified quality across every card matters more than saving a few dollars in-house.
The trade-off is a per-unit cost, but it eliminates staff time spent babysitting a cloning tool and removes the risk of one bad clone slipping into a batch. For project specifics, call DiscBurn at 612-782-8200.
Network-Based Deployment (for OS/Software Distribution)
If your devices support network booting, PXE-based deployment sends an OS image directly over the network instead of duplicating physical media. Microsoft's Configuration Manager documentation describes this as client computers requesting a deployment that a distribution point delivers automatically.
This approach works well for centralized software rollouts, but it requires compatible infrastructure and isn't a fit for distributing physical cards to devices that must boot from SD.
Frequently Asked Questions
Does Rufus work for cloning SD cards?
Not really. Rufus states plainly that "the scope of Rufus is to create bootable USB drives, and that's about it" (Rufus FAQ). Use a dedicated cloning tool instead for accurate SD card duplication.
How long does it take to clone an SD card?
It depends on card capacity, data volume, and USB interface speed. Small cards can finish in a few minutes; large, high-capacity cards can take over an hour.
Will cloning an SD card delete the data on the target card?
Yes. Cloning overwrites everything already on the target card, so back up anything important there before you start.
Can I clone a larger SD card onto a smaller one?
Only if the source card's used data fits within the smaller target's capacity. You'll need intelligent/used-space-only cloning rather than sector-by-sector for this to work.
What's the difference between cloning and simply copying files?
Copying files only moves visible data. Cloning duplicates the entire disk structure — partitions and boot sectors included — so the target card functions identically to the original.
Can I clone an SD card without a computer?
Yes. Standalone hardware duplicators handle this without a PC, and for larger volumes, a professional duplication service can manage the whole process off-site.